To install the control panel, you will need the following:
Use an RJ45 UTP cable to connect the control panel to the inverter/charger. The cable is available in a variety of lengths (30cm to 30m) and is not included with the control panel.
If you are utilising the generator support functionality, two wires are required to connect the control panel to the transfer switch. Use wires with a thickness between 0.25 and 1.0mm². These wires are not included with the control panel.
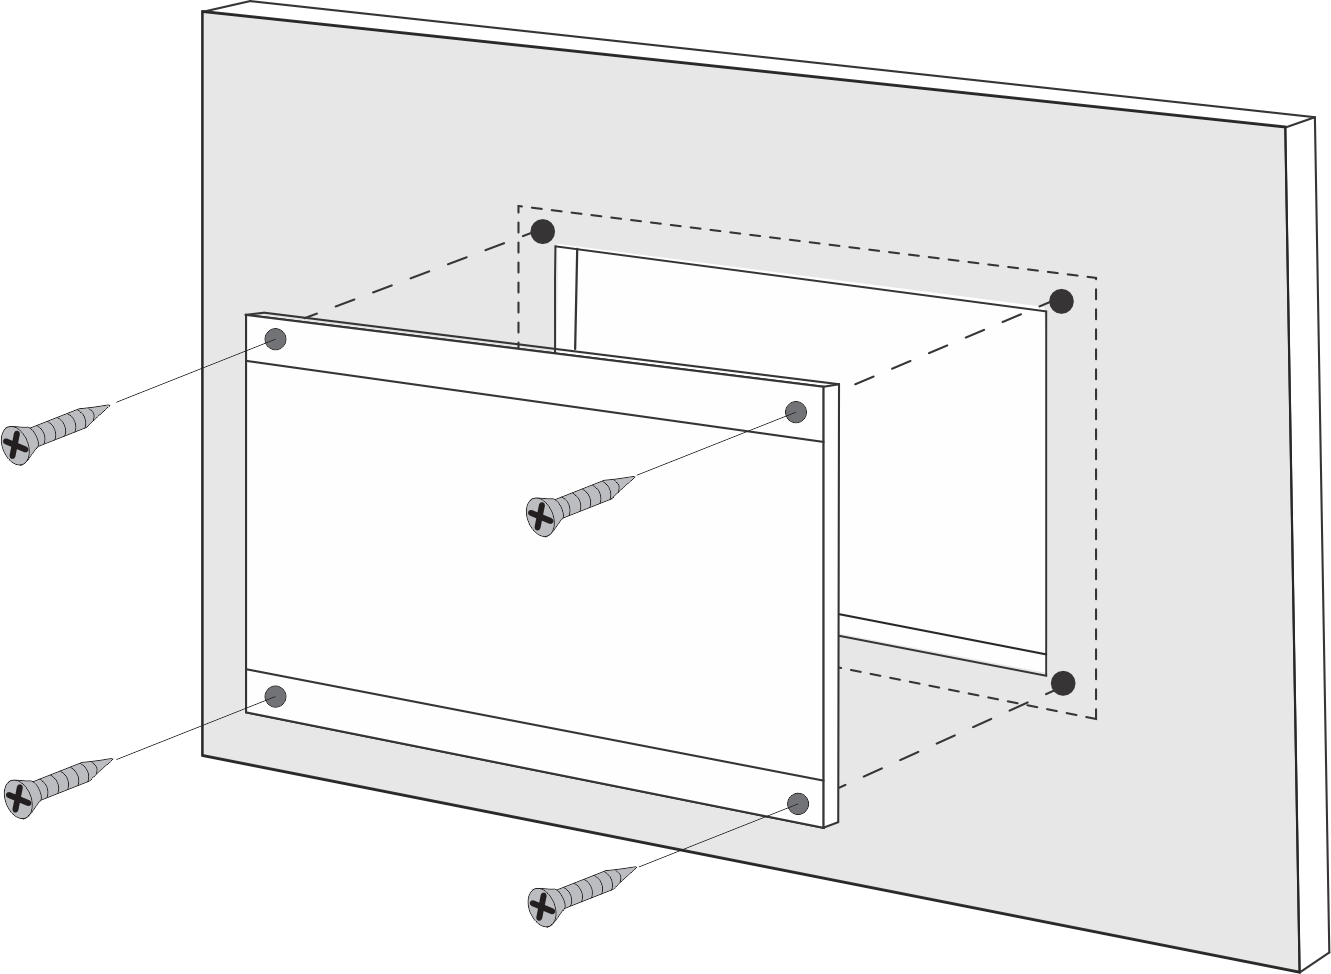
Use the four screws to mount the control panel as indicated below.
 |
For control panel dimensions and mounting hole locations, refer to the Dimensions chapter.
Use a regular straight UTP cable with RJ45 connectors to connect the control panel to the inverter/charger or the inverter/charger system. If there are multiple units, connect the control panel to any unit with an available unused RJ45 port.
Note: In the case of a pre-VE.Bus multiple unit system, connect the control panel to the master unit.
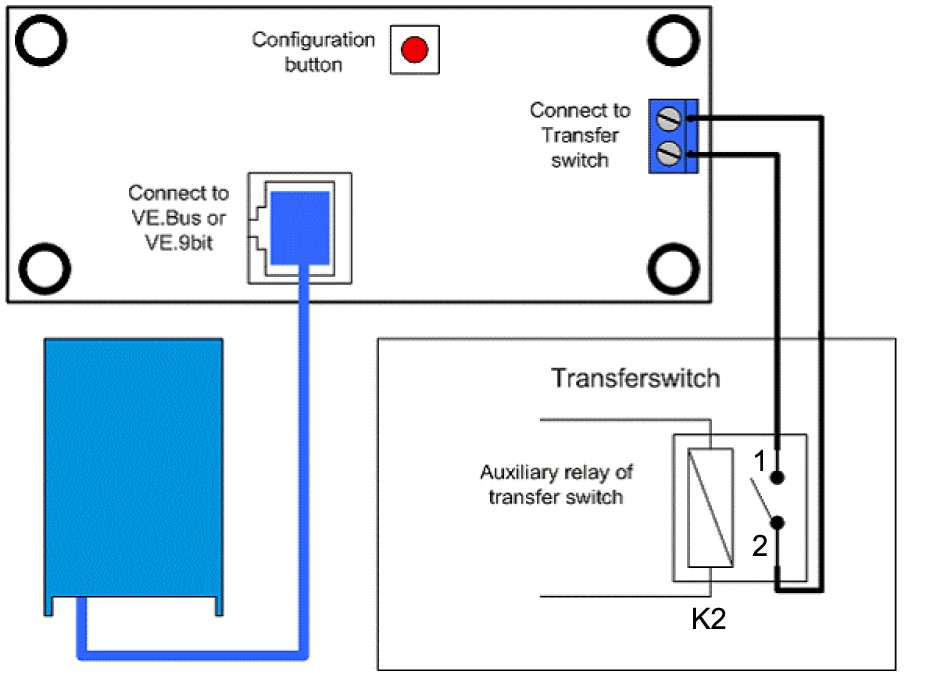
If an external transfer switch is used, connect its auxiliary relay to the screw connector terminals on the control panel's backside. When the auxiliary relay is open, the AC current limit can be adjusted by the control panel knob. If the auxiliary relay is closed, the control panel sends a preset generator AC current limit to the inverter/charger system. The auxiliary relay is controlled by the external transfer switch.
 |
Transfer switch connection.